Creating a Filter Wizard
You can use a Filter Wizard to guide webshop visitors through a series of questions and help them find the most suitable products.
Creating a Filter Wizard consists of two parts:
- Configuring the wizard logic in the CloudSuite App.
- Adding the Filter Wizard widgets to a page in the CloudSuite Admin CMS.
Configure the Wizard Logic
In the CloudSuite App go to PIM > Marketing > Search and navigation > Filter Wizard.
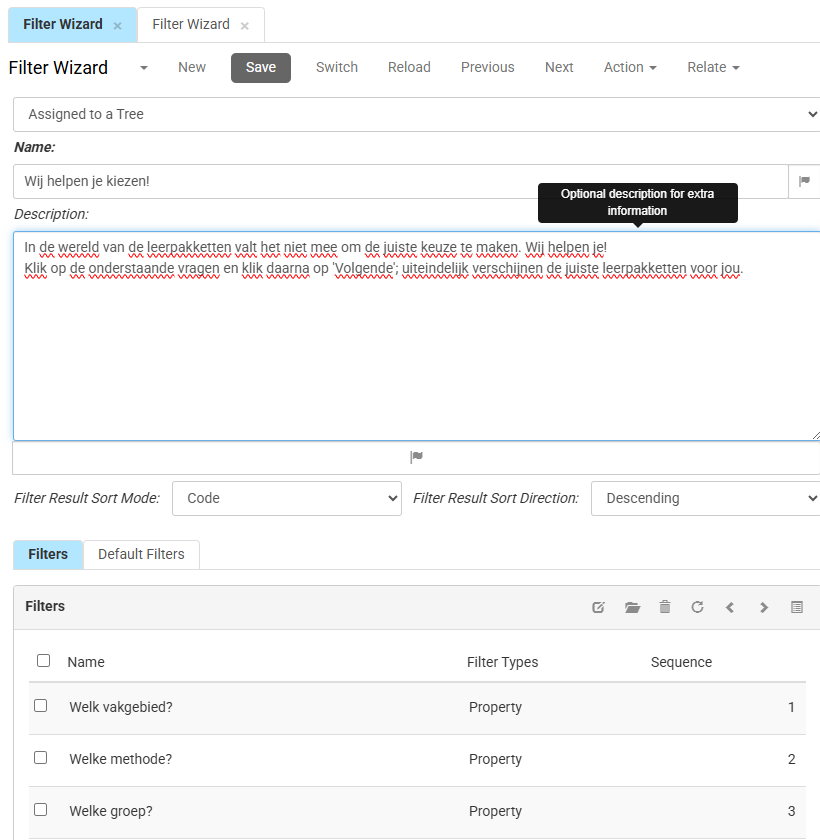
- Click New to create a Filter Wizard or double-click an existing one.
- Select a value in the type drop-down. This determines how the Filter Wizard is linked to the webshop (default is "Assigned to a Tree").
- Select the specific Tree below Default filters where the Filter Wizard appears.
- Enter a value in Name. This title is displayed to webshop visitors when the Filter Wizard is shown.
- Optionally enter a value in Description. Use this text to explain the purpose of the Filter Wizard or provide instructions before visitors start answering the questions.
- Configure Filter Result Sort Mode and Filter Result Sort Direction. These settings determine how the resulting products are displayed after a visitor completes the Filter Wizard.
Create the Questions
Configure a Filter
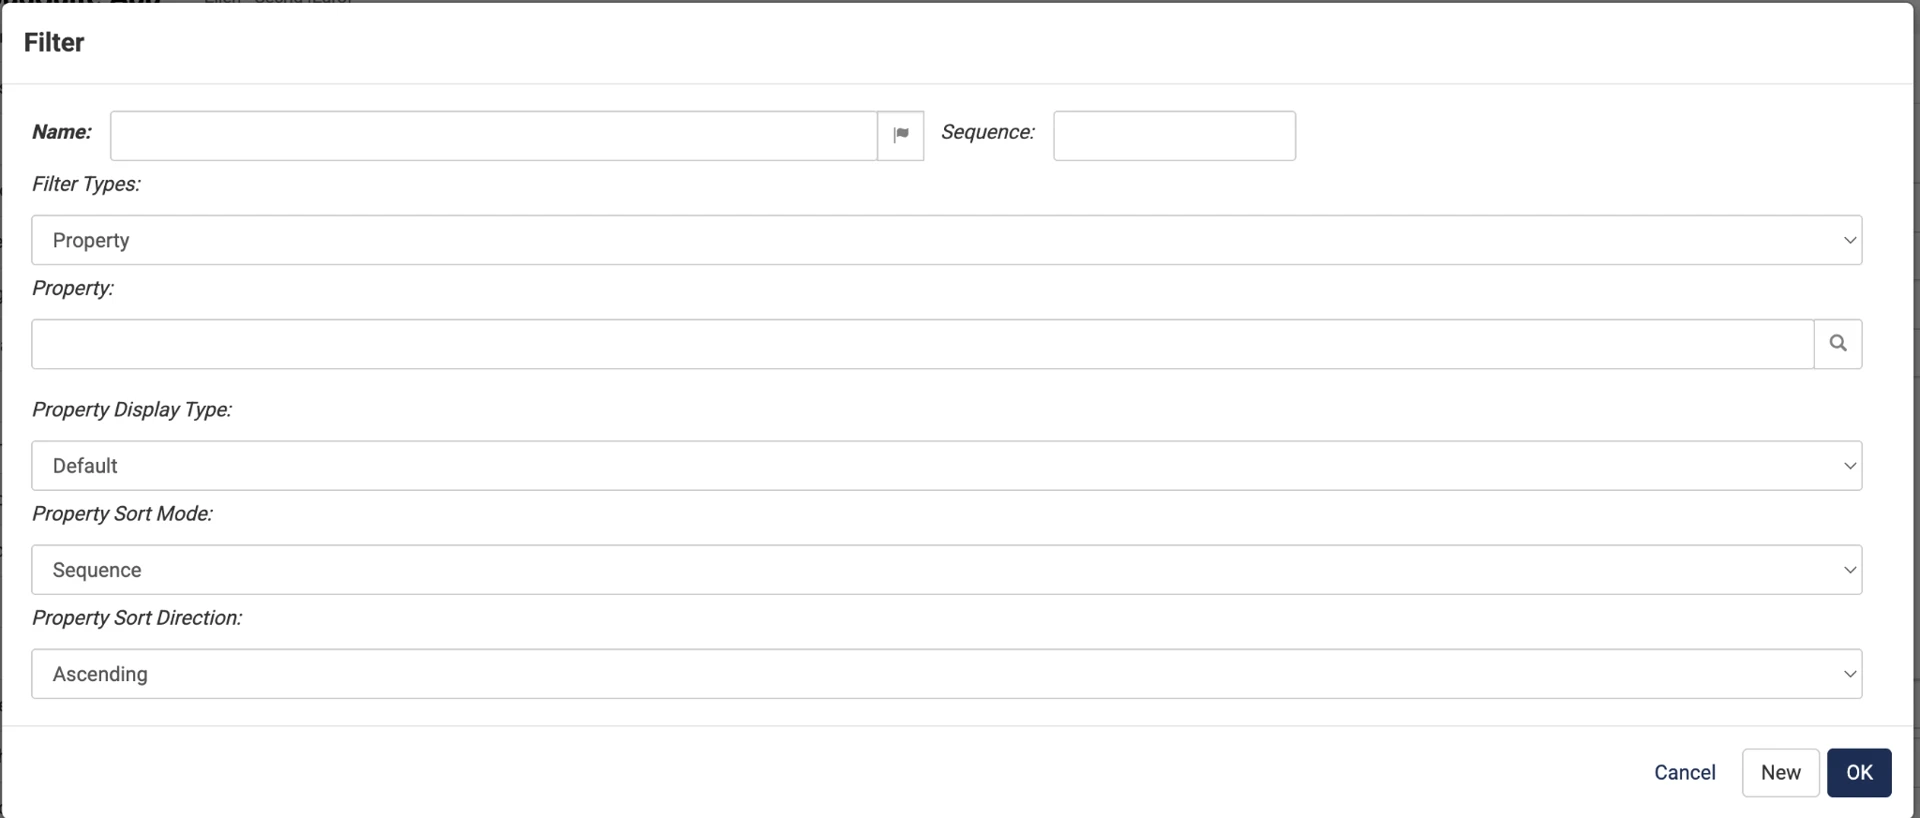
- Enter the question in Name. This question is displayed to webshop visitors as a step in the Filter Wizard.
- Enter a value in Sequence to determine where the question appears in the flow. Questions with a lower sequence number are displayed first.
- Select Property in Filter Types.
- Select the property that visitors should use to filter the assortment. For example, you can filter by colour, material, brand, or application.
- Configure Property Display Type, Property Sort Mode, and Property Sort Direction as required.
- Click Save.
Repeat these steps for each question you want to include in the Filter Wizard.
Link the Filter Wizard to a Product Category

- Open the Default Filters tab.
- Select the tree node where the Filter Wizard should be available.
- Click Save.
When a webshop visitor opens the selected category, the Filter Wizard is displayed instead of the standard search results.
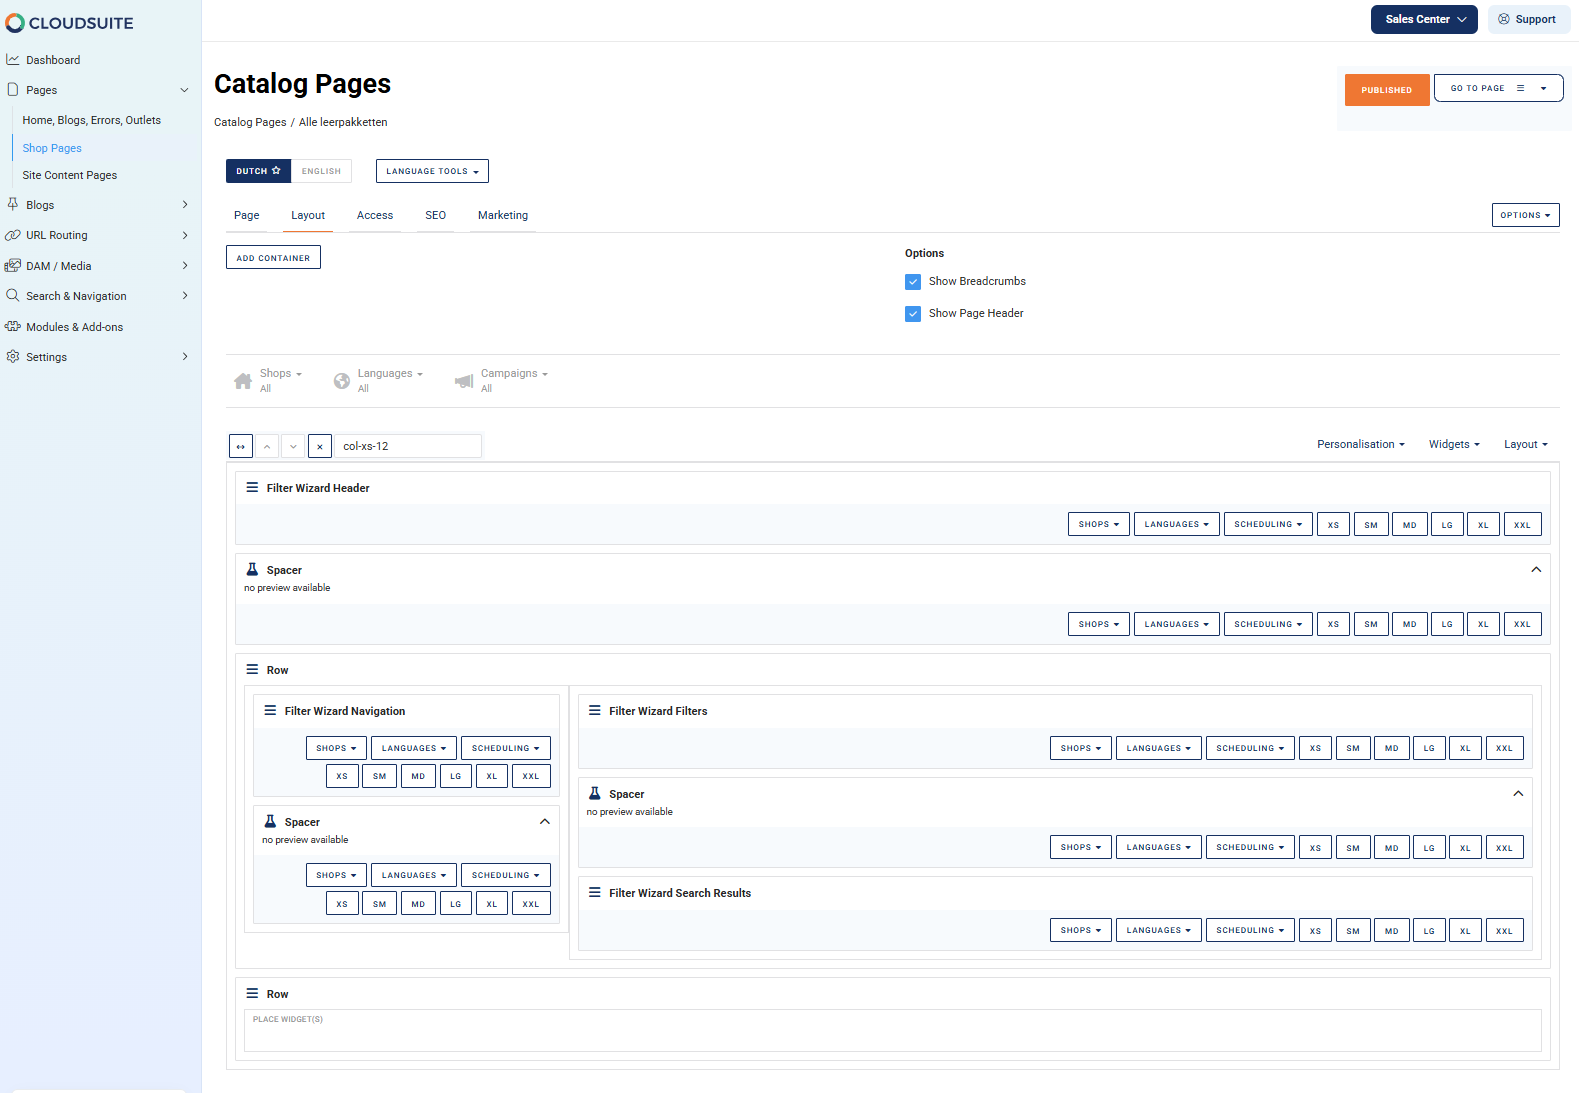
- In the CloudSuite Admin, go to CMS > Shop Pages.
- Create a page or open an existing page.
- Assign the same tree node that is linked to the Filter Wizard.
- Set the Grid: Create a row with a 3/9 split (for desktop) to allow the wizard navigation to sit alongside the results.
Add the Widgets
- Add the Filter Wizard Header widget.
Tip: Insert it twice—set one for "Large screens only" at the top left, and the other for mobile view to ensure it stays visible at the top of the phone screen. - Add the Filter Wizard Navigation widget below the header. This displays the "Next" buttons and step indicators.
- Add the Filter Wizard Filters widget. This generates the actual clickable options (like "Anthracite" or "Matte Black").
- Add the Filter Wizard Search Results widget in the larger column (the "9" of your 3/9 split). This is where products will appear.
- Click Save and Publish.
Ensure no other active pages are assigned to the same category, as they may overwrite your new wizard.