Customers
To work with customers, in the CloudSuite App go to Customers > Customers. An overview appears, listing all customers that have already been defined. Double-click an existing customer to open its details or click New to create a new one.
- Enter the Name of the customer.
- Enter the customer Code.
- Choose the Language in which the shop is presented to the customer.
- Optionally, enter an Alias under which the customer is known.
- The customer is Active only when the corresponding box is checked. This is the default when creating a new customer.
Categories
This tab lets you assign a category to the customer. The category is used only for filtering in the App and does not have a function on the webshop.
You would use this functionality when you have multiple shops in the same environment. All customers are always visible in one overview, but the shop that the customer belongs to is not directly visible. If you assign customers to a category to divide them, for example, per shop you can then use the Category field in the filters to only search for customers for a specific shop.
Catalogs
This tab contains two lists of catalogs.
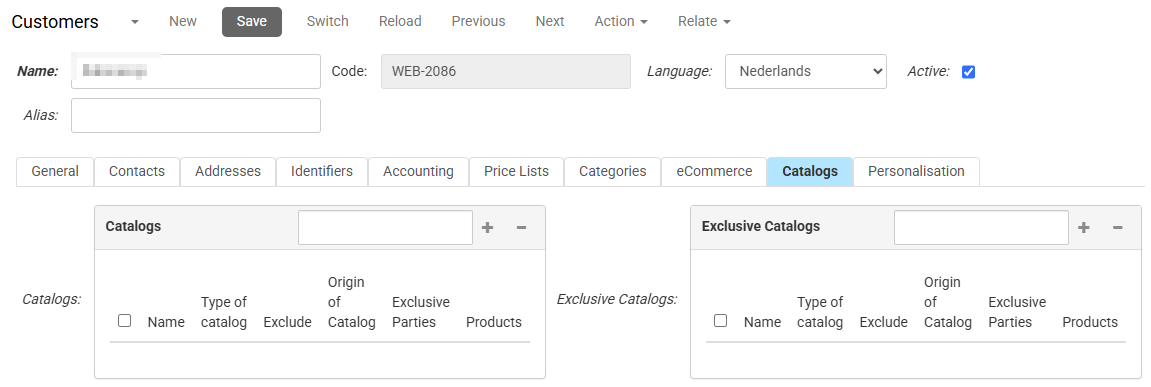
- The list Catalogs overrules the shop catalogs for the customer. Note that any catalog in this list can be marked in the in the catalog details as Exclude, meaning that the products in the catalog will not be shown to customers who are linked to it.
- The list Exclusive Catalogs extends the shop catalogs for the customer. A side effect of this is that any products in an exclusive catalog are no longer visible to other customers (even when they exist in a shop or customer-specific catalog).
Personalisation
If the Modified Ranking feature of our Relevance and Recommendations Module has been activated, you can link one or more customer segments to a customer, to allow for personalized recommendations and personalized content.
To link customer segment to a customer, go to the Personalisation tab and select the required Segments.